
Wikimedia Foundation Legal department/How to edit
How to use this page
This page includes some basic information on how to start pages, edit them and include images using MediaWiki software. You can read it all the way through, or you can use it as a reference, checking sections that seem relevant to you. It seems like a lot of text, but there are no tests, and you can come back for assistance whenever you like.
It contains some images that have been reduced to "thumbnails." To see any of these more clearly, click on the "enlarge" button - this symbol: ![]() - beneath it. (You can get an even better view of images by waiting for the image to expand and then clicking on the image itself.) You may need to use your brower's "back" button to return to this page, unless you right click and open it in a new window or tab. There is a gallery at the bottom of the page with a few more images.
- beneath it. (You can get an even better view of images by waiting for the image to expand and then clicking on the image itself.) You may need to use your brower's "back" button to return to this page, unless you right click and open it in a new window or tab. There is a gallery at the bottom of the page with a few more images.
[edit]
This page discusses editing, but sometimes it's helpful to learn more about using, or navigating, especially if you are new to MediaWiki software. See Legal/How to navigate for information on:
- Searching
- Namespaces
- Categorization
- Differences between wikis
- Contribution histories
How do I start a new page?[edit]

If the new page you need to create is going to be mentioned in another page, you can go ahead and add the title to the other page before the new page is created. If you link to a page that doesn't exist, the title appears in red (called a "red link"). Clicking on this red text (which will look like this) will take you directly to the edit screen to allow you to create the page at that title.
- If you'd rather start your page in a relatively private space, see How do I use a sandbox?, below.
The first step to starting a new page is choosing the title of your document. You should try to make it as obvious as you can so that people can easily find it, but don't worry if there are several search terms you'd like them to be able to use. Pick a good title, and we'll talk about how you can set up alternate titles through the search function a bit further down.
If the title you've chosen doesn't already exist, searching for it will put you on a page that offers you the option to create it. (If it does already exist, you'll need to choose a new title.) To start your new page, find the words "Create the page" and look for the title, in red letters, after them (see image to the right). Click on the red words (which will look like this), and you will find yourself in the editing screen. At that point, you may type anything you like within the large editing box. The moment you hit "save page", below the editing box, you will have started your new page. That's all there is to it; it will be immediately visible to anybody who is able to access your wiki.
Alternate titles[edit]
If you do have alternate titles that you would like to point to your page, you can create a "redirect" page. To do this, you would start by following the same steps you just used to create your new page, but once you reach the editing window for the alternate title, you would type the following:
#REDIRECT [[Actual page title]]
If you've done this correctly, the page that you create will include the title of your new page preceded by a hooked arrow. (See the gallery below) When anyone puts that term into the search engine, it will take them to your new page.
How do I use a sandbox?[edit]
What if you want to work on a page in relative obscurity before publication? What if you want to completely replace the contents of an out-of-date policy here and would like to make the change in one fell swoop? You have the option to edit in a "sandbox".
Please note that sandboxes are not really private. Anyone who can access a wiki can read any page on it, unless it's been deleted. But it is generally regarded as a private area and it will not be stumbled onto through the "Search" bar unless the searcher is specifically looking through "user" space.
You create your own sandbox in your userspace. You can find your (yes, your) user sandbox here. (And if it doesn't exist yet, feel free to create it!)
After you've developed a page in a sandbox, you have two options for getting it to the page you want. You can move it, or you can copy-paste the code and put it where it needs to go. The former option isn't really a good one if the page already exists; it only works if you delete the old page (and you can only do that if you have "administrator" access). Moving carries over the entire history of your page, which means that everything you've done in your sandbox will go with it to the new page. If you've developed other pages in that space, you might find it less confusing just to copy and paste the code.
How do I move a page?[edit]
You should be careful in moving established pages to new titles especially on public wikis. Each public project has its own conventions, and you should familiarize yourself with local policies before moving pages in this way. Even on a private wiki, if you are not the author of the original page you should consider checking first if you think the move may be controversial.

When a page is moved, it is relocated to a new title. You may need to do this because you've figured out that the original title is no longer a good one (or never was) or because you've been developing a page in a sandbox and it's time to present it to the world.

After clicking "move" underneath the down arrow key in the top right hand tabs on the page, you will be taken to a special "move" page which offers you a number of options.
- First, you need to choose the new title. There is a pulldown bar which defaults to the same "namespace" you're currently in. (If you don't know what that means, check out Legal/How to navigate#Searching and namespaces.) You particularly may need to change that if you are moving a sandbox, like this one, to another space. You need to know what namespace is appropriate. Especially in private wikis, the "(main)" space is usually the one where policies, practices and guidelines are published and which is crawled by default through the "search" bar. In other wikis, this varies. In the Wikipedia project, for instance, the main namespace is (articles), and on Commons it is (gallery). Once you're sure the namespace is right, just type the new title into the box beside that pulldown bar.
- Entering a reason matters less in private wikis than in public ones, where moves need to be understood by a wide community. It doesn't hurt to explain in any wiki, though, just in case there's ever confusion.
- "Move associated talkpage" is checked by default if a talk page exists. If the page has no talk page, it should not appear. If you are moving a public page from one title to something better, there may well be old comments about the former page. In this case, it's a good idea to move them so that they don't become "orphaned". There's little reason to change the default here.
- It's up to you if you want to "Watch source page and target page." That simply means that you'll be notified when somebody else edits them.
- The option to "leave a redirect behind" will only be offered if you have administrator status on the wiki you are editing. If you do not, the redirect will be automatic. If you are offered the option, it may or may not be a good idea to "leave a redirect behind". If you are moving from your userspace sandbox to the main space, a redirect is not really necessary. Uncheck it. If you are moving a page to a better title, it may be best to leave the redirect. People who have bookmarked the old name or simply remember it will be able to find it at its new home.
Once you're happy with the new title and are sure the options are checked or unchecked as appropriate, clicking "move page" will take care of you. Unless there's already a page at that title.
Talk about it! Collaboration is important on all of our projects. If people are reasonably likely to misunderstand anything you're doing, explain it on the talk page, not just in edit summary. If people are reasonably likely to object, it will be appropriate in many cases to talk about it first on the talk page and wait a day or so to see if there are objections. If anyone objects, before or after an action, try to cordially work it out.
So, what if there is? That depends on how you (and others!) feel about the old content. Assuming that your new content is uncontroversial, you basically have three options:
- Forget your plan to move the page. Copy and paste the content of the old page on top of what's already squatting at your old title. This is often the best option, since it will leave a record in history of how the page developed. Be sure to:
- leave an edit summary when you paste the content in, naming the page it came from,
- leave a note, if you are not the sole author of the content, on the talk page of the old title indicating what you've done so people know it must be retained for attribution history, and
- create a redirect where the old title used to be.
- Move the first page (the one squatting on your title) to something else. For instance, move it to Old title/archive. This may be a good thing to do on some of the private wikis when you absolutely do not want anybody confused about two versions of a document, but can occasionally be appropriate on public or semi-public wikis. (For instance, when the WMF adopted a new Terms of Use, the old ones were moved from the title on Wikimedia Foundation Wiki. They are still easily visible to those who contributed under them, and there is no risk of confusion with the current terms.) Leave a note explaining where the old page went at the talk page.
- If appropriate, ask an administrator on the wiki you're working on to delete the page so you can have that space. If anyone might for any reason ever want to access that text, you might as well take option 1 or 2. Option 3 will seldom be an appropriate step on a public wiki.
How do I use MediaWiki markup?[edit]
- On some projects, you have the alternative of using the Beta VisualEditor on some pages; see mw:Help:VisualEditor/User guide or look for documentation on the project you're using.

Using MediaWiki markup is a lot easier than it used to be! Once you enter the "edit" screen (either by pressing "edit" on the toolbar, several tabs before the "search" box, or by starting a new page), you will find a markup toolbar just above the big editing window. While you can do everything the markup toolbar permits manually, the markup toolbar makes things much easier, especially for new contributors.
As of this writing, the markup toolbar offers six icons followed by three words.
- The Bold (B) tool. Pressing this will place
'''Bold text'''on the page. Any text you use to replace the words "Bold text" will appear bold after you hit save. Alternatively, you can create the effect yourself by using three apostrophes before and after the text you wish bolded. - The Italic (I) tool. Pressing this will place
''Italic text''on the page. Replace the word "Italic text" or create the effect manually by placing two apostrophes before and after text you wish to be italicized. - The Embedded File tool. Pressing this will place
[[File:Example.jpg]]on the page. Replace the words "File:Example.jpg" with the title of the file you wish embedded, and it will be placed on your page. (We'll talk more in another section about other things you can do with these files.) - The Signature & Timestamp tool. Pressing this will place
--~~~~on your page. Commonly used on talk pages and discussion threads, this will automatically "sign" your notes with your username and a dated timestamp. For example, I generated this by using the tool:--Maggie Dennis (WMF) (talk) 14:08, 29 August 2013 (UTC)). - The Link tool. Pressing this will open a small work window (see gallery for a screencap) asking for more information. The first text box asks for the target page (if it is on a connected Wiki) or URL. The second box asks you if you would like it to display different text. For example, if I wanted to take you to my user page, I would enter User:Mdennis (WMF) in the first box and perhaps "my user page" in the second. This would render like this: My user page. If linking to a wiki page, it will handily tell you if the page does or does not exist.
- The Reference tool may be of less use in work on private wikis than on projects such as Wikipedia, but while references are not always called for on private wikis it can be used to display footnotes. Pressing it generates another small work window where you are invited to enter your text. The output looks like this>
<ref>Testing testing testing</ref>. When the page is saved — that is, when you are no longer in edit mode — this will show as a numbered footnote. If you have not placed<references>somewhere near the bottom your page, this footnote will not display.
Three three words hide an awful lot of additional function.
Advanced[edit]
The "advanced" tab (depicted in open position in the screencap at the top of this section) offers a number of possibilities.
- Headings come in multiple levels and multiple sizes. Wiki protocol says that most documents use Level 2 headings to subdivide sections, with subsections inside them set out by Level 3, Level 4 and so on. You can see this in action here, as the "How do I use MediaWiki markup?" is a level 2 heading, while the "Advanced" section is level 3. You can use the pull down selection to generate the headings you need. It will appear on a new line looking something like this:
== Heading text ==. You replace the words "Heading text" with your section title. You can do this yourself by simply starting a new line and using equal marks (=) before and after your heading title. Use two for a level two header, three for a level three header, four for a level four and so on. Pretty easy. - Lists can either be bulleted or numbered. Using these tools will allow you to generate an entry in a bulleted or numbered list. You can also easily make these yourself by preceding your item with asterisk (*) or the pound sign (#). Caveat about numbered lists, though. If you have to do a paragraph break or a carriage return in the middle of a list, you're going to mess up your numbering scheme. The simplest way to avoid that is to cheat a bit by using
<br />rather than an actual carriage return. (There's actually tool for that, coming up.) The MediaWiki software is currently fooled by this. The right way to do is explained at w:Help:List, but that's definitely a bit more advanced. - Indented line is, honestly, more trouble than it's worth unless you just can't remember that to create an indent you use a colon (:) before your text. Want a deeper indent? Use two colons (::) or more. If you just can't remember, though, it'll put the colon on the page for you, along with the words "Indented line", which you will then have to manually remove.
- Nowiki (A "W" slashed out in a red circle") is a sometimes handy tool to keep MediaWiki markup from functioning. I've used it a lot in this page to show you what markup looks like. Pressing the icon produces the following:
<nowiki>Insert non-formatted text here</nowiki>. - New line (A fat arrow pointing left) generates a
<br />. Most of the time you don't need this, as the software generally reads spaces on the edit screen. If it isn't, though, the<br />may be your answer. It's necessary for addresses, for instance. - Font big, small, super, sub. Pressing on any of the series of
As will affect the size and/or placement of your text by placing the following codes:<big>Big text</big> <small>Small text</small> <sup>Superscript text</sup> <sub>Subscript text</sub>.. Text placed between the codes will display in the specified style. - Insert picture gallery. The first of the "insert" icons generates a picture gallery (like the one at the bottom of this page). You will simply need to replace
File:Example.jpgwith the name of the file and "Caption" with an actual description of the image. - Insert redirect. The blue left-facing arrow generates
#REDIRECT [[Target page name]]. As you read in how to start a new page, this allows people using search engines to find a page when using different search terms than the page's title. - Insert table. The table icon puts a simple "wikitable" template down which you must then fill in. For more detail about "wikitables", including how to use this tool, see How do I create a table?, below.
Special characters[edit]
Next to the "advanced" tab, "special characters" offers you access to characters used in a number of other languages, including Latin, Greek, Cyrillic, Arabic, Hebrew, Bangla, Telugu, Sinhala, Gujarati, Thai, Lao and Khmer. Two of these, Latin and Arabic, are broken down into two sections, with overflow marked "extended." If you need to write "Motörhead", you'll find your umlaut here. Simply click on the name of the language, and you can access a slew of letters. Click on the letter you wish to use, and it will be added to your document wherever your cursor is positioned.
There are also sections for the International Phonetic Alphabet (frequently used on projects for writing pronunciations) and Symbols.
Help[edit]
The "help" tab, your final choice in the markup toolbar, offers you a very simplified cheat-sheet for editing Wikipedia. It includes information on the following actions:
- Formatting
- Adding Links (internal or external)
- Adding Headings
- Creating Lists (bulleted or numbered)
- Embedding Files (simply displaying them in small format, as they have been up to now in this document)
- Adding References (more complete than the took, it tells you how to general the simple references you've already seen, above, but also how to have more than one sentence refer to the same footnote, and it will remind you how to make your footnotes display.
- Using Discussion Pages (how to sign with and without a timestamp; how to indent)
How do I leave an edit summary?[edit]

Edit summaries are short notes that go into the page history to tell people what the heck you think you're doing. They are standard and expected on many of the public wikis, like the English language Wikipedia. They may not be required, but one of the quickest ways to flag yourself as a n00b is not to use one. Many of us use fairly non-descript edit summaries for noncontroversial actions. You see a lot of "tweak" or "ce" (copy edit), for instance. But if people are likely to be confused or upset with your actions, or even just likely to be looking it up later in the edit history, it's a good idea to be a little more descriptive.
The summary field is empty if you are editing the entire page, but if you are editing a section will helpfully identify it for you. You don't have to keep the text that is preloaded. You can remove it and start from scratch, if you want. If you do want to keep it, just add your explanation behind it. If you choose to preview the page before saving, the summary will preview right next to those helpful words "Summary preview". You have the option below the edit summary box to mark that you are making a "minor edit". You probably aren't; minor edits are things like spelling fixes. Any edit of substance is not considered "minor." On some wikis, you will by default "Watch this page", but on some you must choose to do this.
You can link to other Wiki pages in edit summaries. This may be necessary if you are copying content from one page to another or simply helpful if, for instance, you want to point out that what you are doing makes a page comply with a given policy. For more on how to link, see below.
How do I create links to other pages?[edit]
Links allow your readers to easily navigate from one page to another or from your page to another site. They can link documents in the same Wiki, or they can link documents across Wikis. They are actually pretty easy to use, although there are a few things you'll want to remember.
To create a simple link to another page in the same Wiki or to an external document, you can use the "link" tool in the Markup toolbar (see above) or you can enclose the title of the Wiki page you want to link to in double brackets ([[Title]]) or the url of the external site you want to link to in single brackets ([http://www.theonion.com/]). Doing that will get you Title or [1], respectively.
You are not stuck, though, displaying the title of the other page or a number for your external link. For a wiki link, you can use a piped link to show different words. If you wanted to link to Wikimedia Foundation elections/Board elections/2009/en but you'd rather not show the full title, you simply insert a pipe, or vertical bar, between the article name and the words you want to display, like this:
[[Wikimedia Foundation elections/Board elections/2009/en|2009 elections page (English)]]
That will display in your text as 2009 elections page (English).
To show a different title for an external site, you do not put a pipe between the full title and the text you want to display, but simply leave a space.
[http://www.theonion.com/ America's Finest News Source]
That will display in your text as America's Finest News Source.

Finally, because Wikimedia Foundation projects have a special relationship, you can link to pages on other Wikis using the same basic markup that you use to link to pages on the one you're on, with a few extra characters added to the beginning. Our Wikis have interwiki linking codes.
For example, if you want to talk about the Online Copyright Infringement Liability Limitation Act and would like to link to the English Wikipedia article for the benefit of those who aren't familiar, you would precede your link with w, like this:
[[w:Online Copyright Infringement Liability Limitation Act]]
This renders as w:Online Copyright Infringement Liability Limitation Act. To pretty up, you can "pipe" your link as discussed above so that the "w" doesn't show.
"w" is the shortcut for Wikipedia, and English is the default language. But you could link alternatively to other languages. If you would prefer to show your readers the Italian language version, you would use a colon and the letter code for the project, :it
[[:it:Online Copyright Infringement Liability Limitation Act|Online Copyright Infringement Liability Limitation Act]]
This will render as Online Copyright Infringement Liability Limitation Act.
Other projects have their own codes, and those projects which exist in different languages can be reached by combining them. To link to a German Wikibook, for instance, you sould type the following:
[[:de:b:Der Wettlauf zum Mond – Die Rolle der Raumfahrt im Kalten Krieg|Der Wettlauf zum Mond – Die Rolle der Raumfahrt im Kalten Krieg]]
This will produce this link: Der Wettlauf zum Mond – Die Rolle der Raumfahrt im Kalten Krieg.
In addition to the cheatsheet on the right of the page, there is a useful matrix of codes at Special:SiteMatrix.
How do I put my page in categories?[edit]
- Don't know what a category is? See Legal/How_to_navigate#Categories
Your first job is figuring out what category or categories best fit your page. If you know that the page you are creating is connected to "Board of Trustees", it may be properly categorized in Category:Board of Trustees, but you might want to look at the category page and see if one or more of the subcategories may be appropriate instead. If your page is of interest to another department, you may want to add appropriate categories to enable their easy location of the page as well. The page Board retreat 2006 is currently located in both the categories for the Board of Trustees, Meta-Wiki, Wikimedia meetups and 2006.
When you have identified a proper category, you add it to your page by placing this code for each category on the bottom:
[[Category:Category title]]
If you do it correctly, when you save your page, your categories will appear as links at the bottom of the page. Be careful with capitalization, spacing and spelling of your categories. If you don't do it correctly, your page will not appear in the right category; it may be the only page we have in Category:Bored of Trustees! A tip off that you've done it incorrectly: the link at the bottom of your page will probably be "red". While new category pages will also be red, category pages that have been around a while should not be.
The markup you use to put a page in a category is the same markup you use when you want to link to another page. This can make it hard if what you want to do is talk about the category and show people where to find it. To make the category title display as a link rather than automatically placing the page in the category, you need to place a colon (:) before the word Category. Typing [[:Category:Board of Trustees]] will display this: Category:Board of Trustees.
Pages in categories are automatically sorted alphabetically. This is usually good, but there are times when you will want to change the display - for instance, if there's an article in your title. There's a special bit of hidden markup to make sure that your categories work the way you want them to:
{{DEFAULTSORT:Way I want it to display, the}}
You can use "DEFAULTSORT" to make your page list under any letter, but be aware that it will display by its actual title. Generally, it's not good to confuse your users! If the reason behind your alternate display isn't obvious, it may be that you just need a better page title.
How do I create a table?[edit]
The simplest way to create a table is to use the markup under the "Advanced" markup toolbar (see more about the markup toolback above). Currently the final option under "insert", this tool will ask you how many rows and how many columns and offer you the option to make your table "sortable." If your table is sortable, your readers will be able to adjust the display by clicking on the section headers—a potentially useful feature especially if your table is long. By default, the table offers three rows, three columns. The code it generates looks like this:
{| class="wikitable"

|-

! Header text !! Header text !! Header text

|-

| Example || Example || Example

|-

| Example || Example || Example

|-

| Example || Example || Example

|}
On left to right oriented langauges, the code reads from left to right, just as your table will. The first "Header text" will appear above your first column, and each of the "Example" spaces will line up accordingly in your table. Of course, you're going to need to replace all the "Example" text and "Header text" with what you want your table to actually say!
The table tool will generate new tables, but it will not expand expand existing ones. This isn't hard to do, if you know the basics. There are alternative routes to achieving some of these goals, but this is by far the simplest.
- Each line of your table must be preceded by
|-. That tells the software to go to a new row. - The first title in your header is introduced by
!. Subsequent titles are introduced by!!. - The first column in a row is introduced by
|. Subsequent columns are introduced by||. - Cells may be blank, but you must include space for each column for your table to display correctly. (For instance, in a three column table, you might have
| User:BobSmith || || Mustacheif you want the second cell in that row empty. But you must keep the vertical pipes before the cell, even if the cell you want empty is the last in the row.) - While you can remove obsolete rows freely, your table must have
|}as the last line.
More advanced information on tables can be found at Help:Wikitable on English Wikipedia.
Converting Excel tables[edit]
Occasionally, users make fabulous tools that others can use to do wikiwork. While there may be others, I know of at least one tool (not part of the MediaWiki software) which permits converting a table created in Excel into MediaWiki markup at http://area23.brightbyte.de/csv2wp.php. In order to use this tool, you will first need to save your Excel table in csv format. We owe user Dusentrieb for this one.
How do I use templates?[edit]
Templates serve the function of form letters or rubber stamps in MediaWiki software; they are time-savers, ways to keep from having to type the same text over and over again. When you use a template, you are basically reproducing the contents of one page in whole or in part on another. They are very easy to use.
For example, Template:under construction is used on Meta to note when a page is being worked on. To use it, you would simply place the name of the template (excluding the "prefix" that says Template:) at the point where you want the image to appear between curly brackets, like so:
{{under construction}}
This will produce:
This page is under construction. Please help review and edit this page. |
This method of duplication is called transclusion. One of the advantages of transclusion is that the content copying is "live" — in other words, if you change the template (which is editable like any other page), it will also be changed on every page where it is used.
Some templates are not transcluded but are instead substituted. For example:
{{subst:under construction}}
This will produce:
This page is under construction. Please help review and edit this page. |
This may (at least as of this writing) look identical, but there is very important difference here: when you substitute, you make a permanent copy on the page where the template is placed. Changing the original template will not change this text. This is more truly analogous to rubber stamping. Transclusion may frequently be the better option for templates, but there may be occasions when substitution will be preferable - when you want to be sure that the language used at the time the template is placed is never changed.
Making templates[edit]
- To test out templates of your own before they are created, see Template:Template sandbox.
If you find that you need to use the same text or notices repeatedly, you might want to save some time by creating templates of your own. Templates can be extremely complex (colored boxes with images and text) or as simple as a word or two. To create one, you begin with the same pattern you use to create a new page (see above), by choosing a name. You will need to type this name every time you use the template, so it may be best to keep it brief and intuitive. Once you know the name, you will create the page but the title must be prefaced by Template:. This prefix lets the MediaWiki software know how you plan to use the page. The term to put into the search engine is Template:Your template title.
The template sandbox[edit]
If you want to test drive your template before publishing, you can do so at the template sandbox. This can be a good idea if you aren't sure that a template will work. The big box at the top of that template sandbox is just there to tell you how to use it; that box will not show up on pages where you run your text template. Do be careful, though, if you use the template sandbox to test your template not to copy over these words when you take your code for final use:
<noinclude>
{{Please leave this line alone (template sandbox heading)}}
</noinclude>
Those words need to remain behind.
The bulk of your template[edit]
Your template can be as simple as a few words. This one produces this:
Hi! This template business really works.
With a little more work, it can be more elaborate. I made this template by using a pre-existing template: Template:Ambox. The simplest form of that box uses this code: {{Ambox|text=Your message goes here.}}. The colored exclamation point is included by default, but it can be easily eliminated by adding |image=no. You can also use different images simply by picking the one you want to use. As a word of warning, unless you have the ability to play with the style of this, you're probably going to want to keep your image at 60 px or below to keep your text from running into it.
I made the following box with this code: {{ambox | name = Template sandbox | image = [[File:Wikimedia.png|60 px]]| text = This template uses the Wikimedia Foundation logo! Snazzy!}}. The finished template looked like this:
 | This template uses the Wikimedia Foundation logo! Snazzy! |
With a tiny bit of your own markup, you can create your own colored (or not) boxes, like this one:
You can also make simple colored boxes pretty easily.
This box is produced with this bit of code:
<div style="text-align:center;border-style:solid;border-width:2px;background:#FAE1E9;font-size:1.3em;font-weight:bold;">
You can also make simple colored boxes pretty easily.
</div>
For a white box, place #FFFFFF where I've used #FAE1E9. You have wide latitude of HTML color codes you use there, but unless you want to start monkeying around with defining text color styles, you'll want it pale enough to display the black. You can vary the font size by decreasing or increasing the number from 1.3.
Finishing off your template[edit]
Whatever you use for the bulk of your template, you should put it into a category just like you put pages into categories (see above). That will allow others to easily find it in one of the subcategories at Category:Templates. But you don't want the category putting every page on which it's used into that category. The simplest way to do this is by putting the category inside of special tags that will prevent it attaching to the pages where the template is used. This would look something like this:
<noinclude>[[Category:Maintenance templates]]</noinclude>
These tags tell the template not to transclude the category to the other page, but only to list itself in that category. Anything you place inside "noinclude" tags will not be copied over with the template.
Sometimes you may want the template to put pages on which it is used into categories without adding itself. For example, Template:under construction adds all pages to which it is attached into Category:under construction, but it wouldn't be appropriate to put the template in that category itself. The tags that do this look like this:
<includeonly>[[Category:under construction]]</includeonly>
Anything you place inside "includeonly" tags will not display on the template page, but only on the page to which the template is transcluded.
Remember when using either of these tags that they only govern what is between the words. Anything outside of them - spaces, characters, images or whatever - will be handled as templates normally are and copied over to any page that uses it.
How do I upload a new file?[edit]

As you know, our wikis can host media as well as text. While the directions for doing this may vary slightly by project — and some of the projects have "Upload Wizards" to help that may change the process completely — to the right, you'll see a "screen cap" of the "Upload file" screen as it appears in English on the Wikimedia Foundation wiki.
- Upload file
- To begin, click "upload file" in the "Toolbox" on the right hand side of the page. (There is an image highlighting the Toolbox in the Gallery below, if you have difficulty finding it.) If the "Toolbox" is collapsed, clicking the arrow next to it will expand the list. Clicking "upload file" will take you to a new screen. (You can also reach this screen by typing Special:Upload in the search box).
- Choose file
- Click "choose file" in the "Source file" box to bring up a search of your own computer. You may select files in any of the following formats: png, gif, jpg, jpeg, xcf, pdf, mid, ogg, ogv, svg, djvu, tiff, tif, ppt, doc, xls, eps, zip, odf, odp, ods, odt, odg, ott, wmv, dv, avi, mov, mp3, aif, aiff, ppd, indd, inx, psd, ai, omniplan, dia, oga. Once you locate the file you want to upload and select it, "open" it. If you have opened it correctly, you will return to the upload screen, where a "thumbnail" will now show you a small version of the media you are about to upload along with information on its format type and size.
- Destination file name
- The first box in the "File description" field is "Destination file name". The software will suggest that you use the same "Destination file name" as the source file name. You do have the option of changing this. Whatever name you use, it should be something descriptive. If you change the recommended file name, do retain the file format at the end of the name.
If the name you have chosen is already taken, the MediaWiki software will show you the image currently occupying that name. If you proceed, you will overwrite the existing image. If you do not want to overwrite the existence image, just type in another name. - Summary
- In the larger box, you should type a "summary" describing what the file is, who made it, and how it is licensed. You don't need to write a book: just put down enough that future reviewers won't be left with any questions about what your image or diagram is meant to show. And record your license, which will be in almost all cases Creative Commons Attribution-Sharealike 3.0. Unfortunately, the pull-down menu for license is not currently supported on many of our private wikis, but you can simply write the license in the box. Please keep in mind, though, that the Wikimedia Foundation logo or the logos for the projects require special annotation to indicate that these are reserved. If your upload makes use of these, please make sure to note that. Some of the projects, like Commons, have templates to help you with this, such as Template:Wikimedia trademark, but you can always simply explain it in text, if need me. It's a good idea to link in your manual explanation to Commons:Commons:Press in case anyone has additional questions about how they may be used.
How do I update an old file?[edit]
Overwriting somebody else's file may be controversial, and even if the original uploader doesn't mind, others might, especially if the file is in use. Sometimes it may be better to upload the new file under another title. However, there certainly are cases when updating is preferable. If you're reasonably sure this will be the case with your image, explain what you've changed and why in the summary on the page (see below for usual instructions). If someone reverts you, you will either need to discuss the matter with them and perhaps others or upload your new file under a new name.
On an existing file description page, in the "file history" section beneath the licensing information and above the categories, you are offered a link to "Upload a new version of this file". Clicking on that link lands you on an upload box that is very similar to the regular upload processes. The biggest differences are that the destination filename is preselected for you (you are replacing the old file, not creating a new one), the licensing box is gone (license is presumed to stay the same) and what used to say "summary" now says "File changes". Please explain what's different and why.
The file that you've replaced will automatically go into use in place of any pages that currently include that file.
How do I position images in my text?[edit]
The quickest and simplest way to put an image in your page is to use the "embedded file" tool from the basic markup toolbar (see section above.) This will drop your image at a corresponding point on whichever page you use it. It will not, however, give you captions or automatically allow you to customize its placement.
I'm sorry to have to tell you this, but making pages pretty with multiple, glittery images in MediaWiki is not easy. It can be done, of course, but if you're coming from the world of shiny, commercial desktop publishing programs, you may be forgiven for recoiling in horror.
The easiest and least elegant way to get an image into a page is to put its file name within brackets:
[[File:Magnify-clip.png]]
This looks like this:
![]()
While this can be particularly helpful with relatively small images you'd like to place inline (![]() ), most of the time, you can and will want to do better than the easiest and least elegant way. Stepping it up a notch, let's break down some simple, basic image syntax. First, let's take a look at this:
), most of the time, you can and will want to do better than the easiest and least elegant way. Stepping it up a notch, let's break down some simple, basic image syntax. First, let's take a look at this:
.jpg)
The code I used to make that picture happens looks like this:
[[File:Mathias-erhart - kittens (by-sa).jpg|thumb|left|alt=A trio of newborn kittens|Going "awwww" at the kitties will make us all feel better.]]
{{clear}}
I gave these cute kitties some specific commands about where to go and how to act.
- The file has been inserted as a "thumbnail" - a smaller version of the original image. I told MediaWiki to do this by inserting "
|thumb" after the filename. Otherwise, the kitties would eat this page. - I told the kitties to sit at the left of the page. If I had not inserted "
|left" into the string, they would be on the right, because that's where files are placed by default. I could also have used "|center" to put the image in the middle. - I gave it some "alt" text in case people who are visually impaired want to know what the picture is. To do this, add the parameter "
|alt=whatever you want to say" - I told the software to put a caption underneath the kitties. If you add a parameter with text ("
|whatever you want to say"), it will interpret this as a caption, because it doesn't have anything else to do with it.
Note that all of this is placed inside the brackets with the file name.
Underneath that, I used a template called Template:Clear. I did this by placing curly brackets around the template's name:
Without this template, the text would have wrapped around the image (you can see all kinds of examples of that on this page, where other images are embedded in the text. You do not need the template if you are using a center placement, because it will not wrap, but it helps when you want nothing interfering with a file on the left or right.
You aren't limited with image size to "full" or "thumb", by the way. You can specify the dimensions that make you happy. See en:Wikipedia:Picture tutorial for more advanced information. But please note that not all of what they describe will work on every project. If you aren't sure, you might want to test it in a sandbox here first.
How do I use discussion pages?[edit]
Every page on the Foundation projects has a "discussion" tab that will allow you to access a talk page. Most of these are meant to be used to discuss development of the page to which they are attached. Some discussion pages are more active than others; it depends on who is watching and interested. Some article discussion pages are heavily watched, and others aren't. On the English Wikipedia, policy discussion pages typically have a lot of eyes, while template discussion pages may have none. Watcher levels may vary by project.
The projects also use discussion boards at some points. These work the same as discussion pages, except that you edit them directly rather than clicking the "discussion" tab. They're usually easy to recognize - there will be a lot of notes with signatures on them!
Unless you chance to encounter LiquidThreads (you might not, as it is not widely used), discussion pages and discussion boards are pretty similar throughout the projects. Remembering a few simple rules of thumb will help you use them successfully.
- Sign your notes. The markup toolbar at the top of every editing screen (see #How do I use MediaWiki markup?) includes an icon that looks like a blue pencil writing in script. Click on this when you are done with your comment to add a signed timestamp. This is very basic discussion protocol. You can produce it manually by typing
--~~~~. If you forget the dashes, don't worry. It's the four tildes that count. Use one too many and you'll only get the timestamp; use one too few and you'll just get your username. Four is the magic count. - Do not top post unless you are on a board that tells you to. Most of them will not. Wikimedians are used to looking at the bottom of the page for new additions. Your answers should come below the person to whom you're responding, and new sections should come at the bottom.
- Introduce a new section on discussion pages and almost every board with a level 2 header by putting a title between equal signs (
==Discussion title==). If you aren't sure about the board you're on, look at how others are doing it. - Indent your response relative to the indentation of the person to whom you're responding. In edit screen, you can see how deeply indented they are by the number of colons before their first word. If they have none, you use one. If they have two, you use three, etc. Sometimes people will throw off this scheme by trying to get fancy, preceding their comments with asterisk. Same rule applies; just put your colons in front of your asterisk. Your response might look like this:
::::*Now that you ask,.... - Notes go chronologically by level of indent. You may sometimes be responding to the same note that somebody else has responded to. Put your note below the other person's (indented correctly to indicate to whom you're responding) and consider adding an extra space for clarity. Alternatively, you can indent one deeper, but specify to whom you are talking by name:
"John, I think....". Some people may object, though. - Once you've finished your response, never go back and change it unless (a) your change is not substantial (fixing a typo, for instance), (b) little time has passed and nobody has replied to you or (c) you clearly indicate where, how and why you have altered your response. (A lot of editors use eta - edited to add and otherwise mark off new material, such as with italics. Material you wish to remove should generally be struck through or replaced with a note that says
<redacted; why>) It is frowned upon in some projects to alter your notes substantially otherwise, since it may make the conversation transcript misleading to others. It's always okay to add a new note clarifying, instead. - You probably already know this, but don't WRITE IN CAPS, be concise, avoid leetspeak and be polite. On the last point, tone is very hard to read in text, and more than one conversation on a Foundation project has run aground when somebody took offense to the way somebody else put something. Politeness varies by culture, and if you are too formal you may seem rude to one user, while over-familiarity may seem rude to another. Pay attention to the styles of people you're talking to. If you wind up with somebody who isn't taking you the way you mean, you may need to adjust.
- Don't forget that every conversation on every project discussion page or board is "on the record." What you say, you say to the masses (or at least the masses who have access to that project) and for the ages. Be clear, and don't say anything you wouldn't want to defend to the New York Times. Try never to edit under the influence - of anything! Anger has probably led to more talk page regret than anything else.
Gallery[edit]
These images are not technically thumbnails, but are still too small to really see. To view them better, click or right click on them, and it will take you to the file page.
-
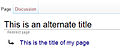 This is a screen shot of a functioning "redirect" page (see How do I start a new page?)
 -
 The insert link workspace (see How do I use MediaWiki markup?)
 -
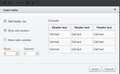 The insert table workspace (see How do I create a table?)
 -
 The toolbox is on the bottom of the navigation bar on the side, highlighted in yellow. If collapsed, this can be expanded by clicking the arrow next to the word (see #How do I upload a new file?)


